
In this short guide for beginners, I’ll give you a quick overview of the new Start Workspace in Adobe Illustrator CC. I’ll show you how to create a new file for web and how to create a new file for print using a preset.
The Illustrator CC Start Workspace
Create a new document for web use from the Start Workspace
Create a new document for print use with an Illustrator preset
What are the main differences between a file created for the web and a file created for print use?
The New Illustrator CC Start Workspace
When we’re talking about a workspace, we’re referring to the arrangement of elements that make up Illustrator’s interface. These elements include the toolbar, panels, options bar and document windows. You have a ton of flexibility with where you can place these elements thereby creating your own custom workspaces within Illustrator.
In the November 2015 release of Illustrator CC a new workspace was introduced.
Check Out The Start Workspace
Step 1. Open up Adobe Illustrator!
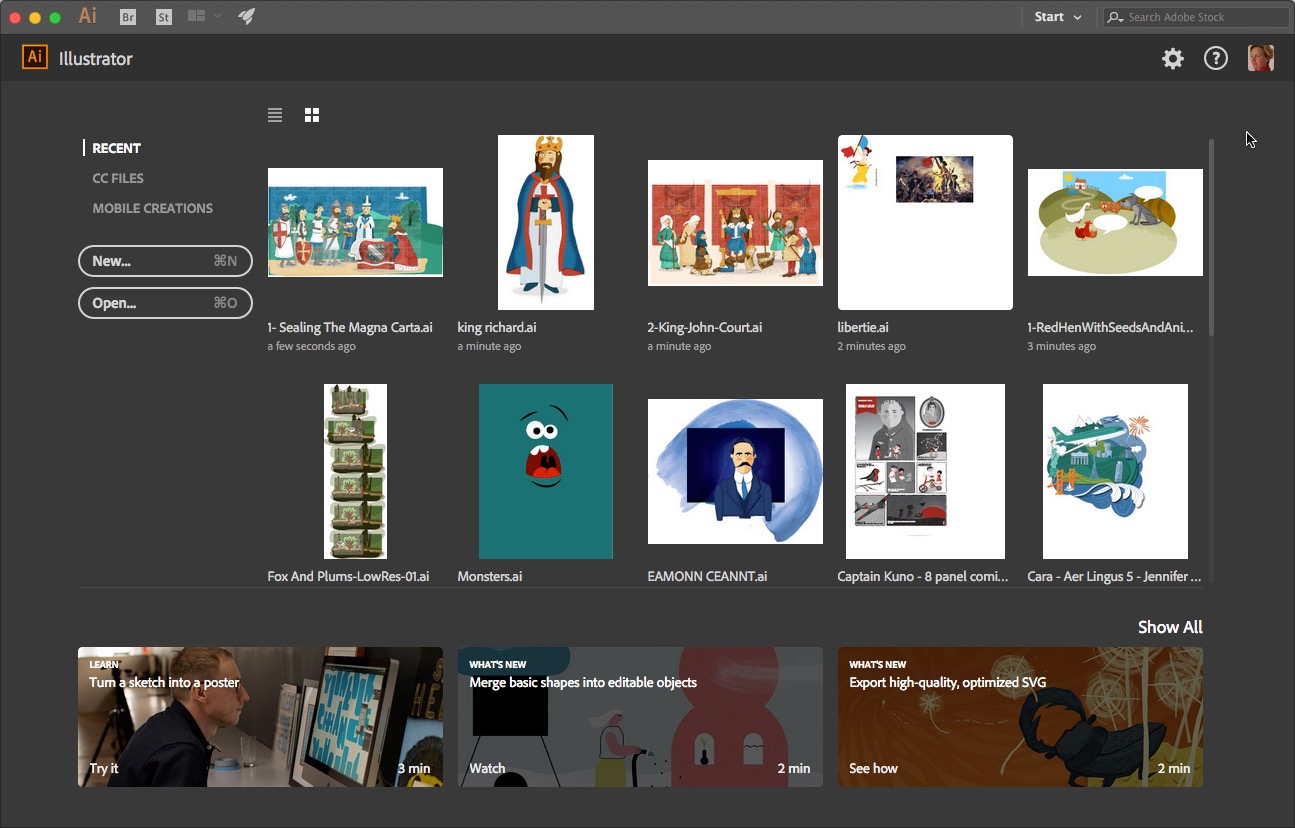
The first screen you’ll see when you start Illustrator CC is the Start Workspace. The Start workspace only appears when you launch Illustrator or when you have no documents open.
This gives you a quick way to create a new document or open recent files or Creative Cloud libraries in Illustrator. You can also view Mobile Creations – work that you have created on a mobile device using applications such as Adobe Illustrator Draw or Adobe Comp CC.
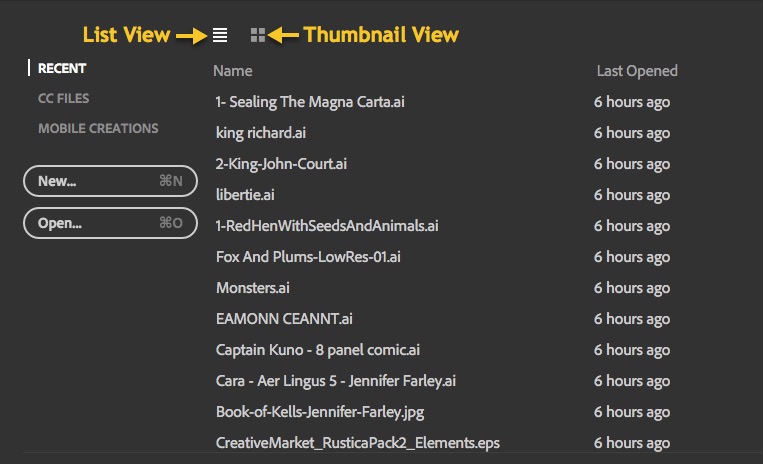
You can view your recent documents as thumbnails or as a list of filenames. To toggle between thumbnails and a list view, click the List icon or the Tile icon. To open any recent file in Illustrator, simply click on a thumbnail or the filename.
If this is the very first time you’ve opened Illustrator, there will be no recent files visible. Once you create your first file it will appear here.
How to disable the Start workspace
If you find the Start Workspace annoying or just don’t want to see it anymore, you can turn it off with the following steps.
Step 1. Choose Preferences > General (Mac) or Edit > Preferences > General (Windows)
Step 2. Deselect Show The Start Workspace When No Documents Are Open.
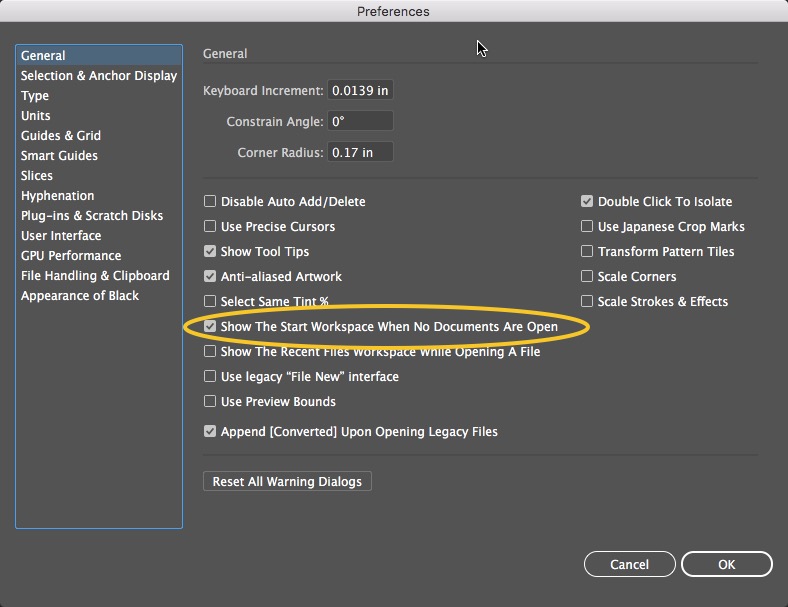
General Preferences – Turn off Start Workspace -Illustrator CC
Create a new document from the Start Workspace
Step 1. Click on the New button on the start workspace or press Cmd + N (Mac) or Ctrl + N (Windows).
or
Choose File > New from the menu at the top of the Photoshop application screen.
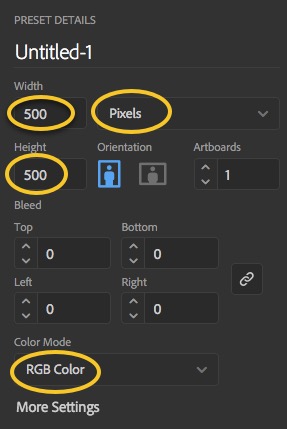
Step 2. The New Document dialog box opens. If you’ve used older versions of Illustrator you’ll see a big change in this dialog box in the CC version compared to the old New Document dialog. The New Document dialog lets you create documents from scratch by adding width, height, resolution and color mode settings on the right-hand side. You’ll now make a square document suitable for web use.
Type 500 in the Width field and change the units to Pixels in the drop down menu
Type 500 in the Height field and set the Color Mode to RGB color.
Step 4. Click Create and your new document opens in Illustrator.
Create a new document using a preset
Illustrator also provides a huge pile of templates you can start with, which are broken into the categories Mobile, Web, Print, Film & Video and Art & Illustration. Choosing a preset can speed up your workflow as you won’t have to fill in the settings for your document each time.
Step 1. Press Cmd + N (Mac) or Ctrl + N (Windows)
or
Click on the New button on the start workspace or press Cmd + N (Mac) or Ctrl + N (Windows).
or
Choose File > New from the menu at the top of the Photoshop application screen.
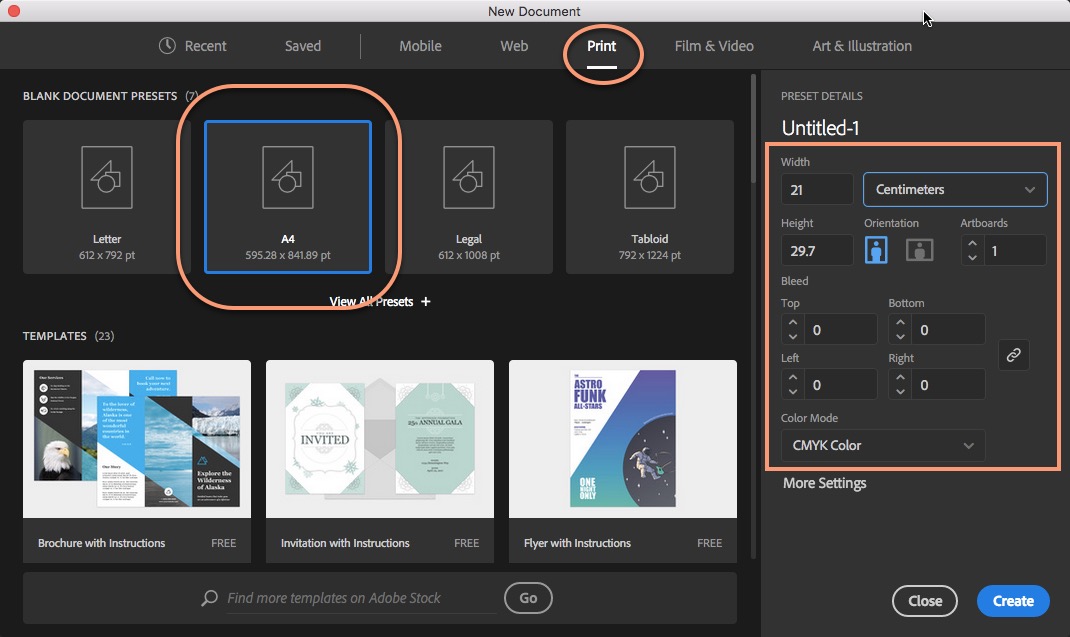
Step 2. The New Document dialog opens as before. This time we’ll use an Illustrator preset to create a file suitable for printing.
Click on the Print category. Then click on the A4 document preset. Notice how the settings change automatically on the right-hand side.
Step 3. Click Create and your new document opens in Illustrator.
What are the main differences between a file created for the web and a file created for print use?
A file created for use on the web will have a resolution of 72 ppi. This is considered a low-resolution image. It will have a colour mode of RGB (Red Green Blue) and it will be measured in units of pixels.
A file created for use in print will ideally have a resolution of 300 ppi. This is considered a high-resolution image. However, depending on how your image will be used, you may get away with a lower resolution of 150 – 200 ppi. It’s best to speak to the printer about what they will need. It will have a colour mode of CMYK (Cyan Magenta Yellow and Black) and it will typically be measured in units such as mm, cm, inch, and sometimes in pixels.
TIP: If you accidentally start your file with the wrong colour mode, don’t worry. You can easily change the document color mode at any time from RGB to CMYK and vice versa as follows:
Choose File > Document Color Mode > RGB Color.
That completes this short guide to the Start Workspace and how to create documents for web and print using Illustrator CC. I hope you found it useful.
I would be very grateful if you could share this guide using the Social Media buttons. Thank you so much!
